The post PISTACHIO CHOCOLATE CHUNK ICE CREAM appeared first on My Digital Kitchen.
]]>With only one month left of summer, there’s no way I can cruise through the next few weeks of summer full of heat and sangrias without any ice cream. This Pistachio Chocolate Chunk Ice Cream is on the menu today because its vegan, refined sugar free, certified delish and no churn necessary.

I can’t believe we’re already in August. It literally feels like summer just started and with a blink of an eye, it’s almost over. This summer has been one of the busiest I’ve ever had that I don’t think I’ve gotten the chance to have as much fun outdoors as I would like, but who’s complaining? I went on an amazing trip to Thailand in May, so even if I don’t get around too many more summer activities, I’m still content. By the way, my vacation post is coming, I haven’t forgotten!

However, I’m definitely not slacking when it comes to summer treats. Wine spritzers, shaved ice, gelatos, funnel cakes, and of course, the almighty ice cream. On warm days, scorching hot days, and even on cloudy or rainy days, ice cream is my go – to guilty indulgence, especially pistachio or praline ice cream which are my two favorites. Sometimes I even have affogato for dessert because I also love coffee, so combining two of my favorite things seems like the right thing to do. As much as I like to treat myself, I prefer to not always cave to my cravings because moderation is key. But hey, I’m human, life happens, and I get peckish. No RAGRETS (not even a single letter).

So, after a little bit of research and experiments of my own, I came up with this pistachio chocolate chunk ice cream. It’s vegan, free of refined sugars, and is an overall healthier and delicious alternative you can enjoy without the guilt. The best part about this recipe is that you don’t need an ice cream maker. All you need is:
- A blender
- A loaf pan
- Foil paper
- Lots of patience while you wait

That’s it! Get ready to indulge and feel great about it.
- 2 ½ cup unsweetened almond milk
- 1 large avocado
- 1 cup raw pistachios, plus a little extra for topping
- ¼ cup organic maple syrup
- ½ cup vegan chocolate chunks, chopped (I used Enjoy Life)
- ½ teaspoon pure vanilla extract
- Add almond milk, avocado pistachios, maple syrup and vanilla in a blender and puree until smooth. Pour into a loaf pan and stir in chocolate chunks. Top with extra pistachios and cover the loaf pan with foil paper. Transfer to the freezer for 3-4 hours. Enjoy when ready.
The post PISTACHIO CHOCOLATE CHUNK ICE CREAM appeared first on My Digital Kitchen.
]]>The post CHOCOLATE AVOCADO PISTACHIO POPSICLES appeared first on My Digital Kitchen.
]]>Popsicles are absolutely essential for summer! So if you stumble on these Chocolate Avocado Pistachio Popsicles, you’d definitely be ending your summer with a sweet bang! Plus, they are vegan! Hello!

I love ice cream; I love popsicles; I love sherbets; I love gelatos. I basically love sweet treats that are frozen and creamy. What I love even more is when my frozen sweet treats are healthy and also easy on my tummy, and that my dear friends are exactly what these popsicles are. They are sweet, yummy and good for the tummy!

Throughout the summer months, I always came across several amazing popsicle posts from other bloggers on my Instagram and Pinterest accounts. I mean that’s no surprise considering popsicles are a summer favorite. However, I always felt like I was missing out on creating these beautiful popsicles because I didn’t have a popsicle mold…. or the standard mold at least. I remember creating a similar popsicle recipe years ago when I was still fairly new to blogging, but the popsicle mold I had purchased at the time came with the plastic reusable sticks and they somehow disappeared.

Also, my photography back then wasn’t the greatest, so I apologize in advance for the awful lighting, mediocre presentation and basis editing skills. After all, life is all about growth right?! Anyways, I decided it was time for an upgrade, so I ordered the popsicle molds with wooden sticks, tweaked my older recipe, and improved my editing skills. Only the best for my lovely readers!

Nevertheless, these chocolate avocado pistachio popsicles were so good! The avocado replicates a creamy texture similar to ice cream, so you enjoy the perks of a creamy popsicle with less calories and zero animal products for those who are vegan. It really is a win win cream-tuation! See what I did there? Okay no more puns.
- 1 ripe avocado
- 1.5 cups creamy almond milk (I used almond breeze)
- ½ cup golden cane sugar
- ¼ teaspoon pure vanilla extract
- ¼ cup crushed pistachios
- ¼ cup melted vegan chocolate (I used Enjoy Life)
- In a blender, add avocado, milk, sugar and vanilla and puree until smooth. Pour mixture into a 10 stack popsicle tray and top the base with pistachios. Place in the freezer for 3-4 hours.
- Take the popsicle tray out of the freezer and leave at room temperature for about 10 minutes. Take the popsicles out of the mold and drizzle with melted chocolate. Serve!
The post CHOCOLATE AVOCADO PISTACHIO POPSICLES appeared first on My Digital Kitchen.
]]>The post SMOKED TURKEY SAUSAGE AND CHEESE PIZZA appeared first on My Digital Kitchen.
]]>Happy Monday everyone! I apologize for being absent, but I’m back! My summer was quite busy and between working a lot and also trying to get in as much summer fun as possible, I didn’t just fall off the wagon, I got hit by it. Now that summer has almost come to an end, things can calm down slightly, which means more yummy and healthy recipes for your lovely faces! Now let’s talk about this pizza…
I’ve always been a fan of experimenting with different kinds of pizza crust recipes, from the traditional cauliflower crust to quinoa, butternut squash, zucchini and even eggplant crust recipes. However, I’ve never made a traditional pizza crust recipe because for starters I felt the process was way too lengthy, and I didn’t believe it could be healthy. After making this delight for my aunt yesterday, I will say that the first reason still stands because it took almost 4 hours to make, including the prep time and making the pizza sauce, but the second reason was completely thrown out the window!
This soft and chewy crust is made with light spelt flour 100% from scratch, topped with low sodium homemade pizza sauce, organic smoked turkey sausage (MSG free), organic mozzarella and cheddar cheese and fresh oregano. So enjoy! Moderation is the key.
Pizza Dough (yields enough for 2 13-inch pizzas)
2 1/4 tsp active dry yeast
1 tsp organic coconut palm sugar
1 1/2 cups warm water, 110 degrees, divided
3 Tbsp olive oil, plus more for brushing
1 tsp sea salt
1 tsp white vinegar
3 1/2 cups light spelt flour
Sauce: (I used 2/3 a cup for topping)
1 small can organic crushed tomatoes
1 medium onion, finely chopped
1 cloves garlic, chopped
½ tsp sea salt
2-3 tbsp raw honey
½ tsp black pepper
1 tbsp oregano
1 tsp onion powder
1 tsp garlic powder
pinch crushed chili peppers
Pinch ground cinnamon
Topping
2/3 cup pizza sauce
1 Tbsp olive oil
1 clove garlic, finely minced
1 cup shredded mozzarella cheese (8 oz)
1 cup shredded cheddar cheese (1 oz)
4-5 smoked turkey sausages, sliced
2 Tbsp fresh oregano (chopped if using larger leaves)
Red pepper flakes, for serving (optional)
For the pizza dough:
In the bowl of an electric stand mixer, combine yeast, 1 tsp sugar and 1/2 cup warm water and whisk until yeast has dissolved. Allow to rest 5 minutes. Add in remaining 1 cup warm water, olive oil, salt and vinegar.
Fit mixer with whisk attachment, set on low speed and slowly add in 1 3/4 cups of the flour and mix until combined. Switch to a dough hook and slowly add in remaining 1 3/4 cups flour, then knead mixture on medium-low speed about 5 – 7 minutes, adding in up to an additional 1/2 cup flour as needed, until dough is smooth and elastic (dough should be slightly sticky but should not stick to a clean fingertip).
Cover bowl with plastic wrap and allow to rest in a warm place until doubled, about 1 1/2 hours.
For the sauce:
To make the sauce, add onions, garlic and seasoning to a small saucepan and cook over medium heat until fragrant and the onions become translucent, 2-3 minutes.
Add crushed tomatoes and honey if using and bring to the boil then lower heat and simmer, partly covered, for about 15-20 minutes, until sauce is thickened and all water has evaporated. Reduce to a fine puree with a stick blender, if desired. Set aside and grate your cheese.
Preheat oven to 450 degrees and set a pizza baking sheet aside. While oven preheats assemble pizza. Punch down pizza dough (divide into two equal 16 oz portions, freeze one in a resealable bag for a later use or make 2 pizzas right away).
Place a sheet of parchment paper over a pizza peel, and then lightly dust parchment paper with flour. Pat/roll and stretch dough on pizza peel to a 13-inch round, while creating a rim along edge of dough. Using a fork (without piercing all the way through) pierce dough many times over surface. In a small bowl stir together 1 Tbsp olive oil with 1 clove garlic and brush evenly over top and edges of pizza, then evenly spread about 2/3 cup of the pizza sauce over pizza (leaving rim uncoated).
Top evenly with cheeses (again leaving rim uncoated). Carefully slide pizza (on parchment paper) onto the baking sheet and place in the oven. Bake for 15 minutes, then bring out the pizza and top with smoked turkey slices. Slide the pizza back in the oven and bake for another 15 minutes until crust is golden.
Remove the pizza from oven, sprinkle top with oregano and optional red pepper flakes. Cut into slices and serve.
The post SMOKED TURKEY SAUSAGE AND CHEESE PIZZA appeared first on My Digital Kitchen.
]]>The post CRISPY BAKED GARLIC AND BROWN SUGAR HERB CHICKEN appeared first on My Digital Kitchen.
]]>Finally! Here’s the recipe for this sweet and spicy crispy goodness. The chicken has the perfect balance of sweet and savory flavors and crispy edges to mimic the texture of fried chicken.
I used deboned and skinned chicken thighs which made it easier to eat, but you can also use regular chicken thighs, especially if you want the extra crunch by leaving the skin on. I actually made these for a family dinner and the reviews were amazing! So I had to share.
Recipe: modified from Damn Delicious
6 deboned and skinned chicken thighs
2 tbsp grass fed butter
1 tbsp Flavor God garlic lovers seasoning (or 3 gloves of garlic, minced)
Sea salt and ground pepper, to taste
3.5 tbsp coconut palm sugar or sucanat + 1 tbsp organic honey
¼ tsp dried basil
2 tbsp fresh parsley leaves, chopped
Preheat oven to 400°F.
Season chicken thighs with salt, pepper, and garlic seasoning.
Melt the butter in an oven proof skillet over medium high heat. Add chicken, and sear both sides until golden brown, about 3 minutes per side, then remove from heat and transfer the chicken into a bowl.
Stir in sugar, honey, and basil until well combined, and then return the chicken into the skillet.
Place skillet in the oven and roast until completely cooked through, about 25-30 minutes.
When ready, serve with chopped parsley and lime.
The post CRISPY BAKED GARLIC AND BROWN SUGAR HERB CHICKEN appeared first on My Digital Kitchen.
]]>The post HEALTHY CHERRY CHOCOLATE COOKIE CAKE appeared first on My Digital Kitchen.
]]>Happy Friday! I made a similar recipe over the holidays last year, but since summer always blesses us with an abundance of delicious red cherries, I decided to replicate this recipe with a summer twist! This is gluten free, low in sugar (I relied mostly on the cherries for the natural sweetness), yummy and easy to make! I also used my homemade powdered sugar, which you can also find on the original recipe.
The original recipe can be found here. Just use cherries instead of strawberries. Have a great weekend.
The post HEALTHY CHERRY CHOCOLATE COOKIE CAKE appeared first on My Digital Kitchen.
]]>The post PERFECTLY GRILLED CORN appeared first on My Digital Kitchen.
]]>If you’re planning on having a bbq or going to one, add some yummy roasted corn the menu!?? These perfect summer side treat is yummy super easy to make. First, turn on your grill, then soak your naked corn in water for 10 minutes. Transfer corn to the grill and brush about 1 tbsp of melted butter on each one. Grill until all sides are evenly roasted, and stick a fork or knife in the middle of the corn to check if its ready. It should be slightly soft. When ready, top with scallions or toppings of choice. Have a great week!
The post PERFECTLY GRILLED CORN appeared first on My Digital Kitchen.
]]>The post CURRY SPICED SAUTÉED SHRIMP IN A BAKED BUTTERNUT SQUASH BOAT appeared first on My Digital Kitchen.
]]>Happy Friday everyone! If you love squash as much as I do, then this recipe is for you! A few strong but not overwhelming flavours going on here, and it tasted amazing! This was definitely a sexy dish and is also a must try. Have a good weekend everyone! Make sure you party! I know I will be 
Recipe:
I small butternut squash (cut in half and seeded)
8 pieces of raw shrimp (peeled)
1 large organic scallion (chopped)
1 tbsp organic red onion (chopped)
1/4 cup grape tomatoes (chopped)
1/2 tsp diced jalapeño
1/4 tsp curry
1/2 tsp organic coconut aminos
1/2 tsp Mrs Dash salt free spice blend
A dash of sea salt and garlic powder
1 tsp organic hemp seed oil (for frying)
Pre-heat oven to 400°F.
Season sliced and seeded squash with sea salt, garlic powder, and coconut aminos. Place on a lined baking sheet and bake for 30 minutes, or until it passes the toothpick test.
When ready, remove from the oven and set aside.
Place a skillet over medium heat and add hemp seed oil. Add shrimp, tomatoes, onions, scallions, curry, Mrs Dash, jalapeños, and a splash of coconut aminos and sauté for 1 minute until shrimp is golden brown.
Serve shrimp with butternut squash and enjoy!
The post CURRY SPICED SAUTÉED SHRIMP IN A BAKED BUTTERNUT SQUASH BOAT appeared first on My Digital Kitchen.
]]>The post PALEO CREAM AND BLUEBERRY PARFAIT SHOTS appeared first on My Digital Kitchen.
]]>Super simple but yummy. This recipe contains coconut whipped cream, stevia, a splash of pure vanilla extract, and my sugar free homemade blueberry jam, that’s it! If you want the blueberry jam recipe, type it in the search bar and you will find it 
The post PALEO CREAM AND BLUEBERRY PARFAIT SHOTS appeared first on My Digital Kitchen.
]]>The post VEGAN SWEET POTATO PROTEIN PANCAKES WITH HOMEMADE SPICY BLUEBERRY JAM (SUGAR FREE) appeared first on My Digital Kitchen.
]]>Breakfast time! Quick and packed with macro and micro nutrients to kick start my metabolism before I make a long drive to my job interview *fingers crossed.* These were topped with fresh blueberries, coconut whipped cream, and dairy free dark chocolate shavings. Cheers lovies!
Recipe for pancakes:
1/2 cup cooked sweet potato puree
1 tbsp flax/chia seed powder (I used organic traditions)
1/4 cup almond flour
1 tbsp coconut flour
1 organic stevia sweet leaf sachet
1/3 cup unsweetened almond milk
1/2 scoop vanilla sun warrior protein powder
A dash of cinnamon
Place all ingredients in a food processor and purée until smooth. Fry with 1 tsp virgin coconut oil.
Top with blueberry jam (type in “jam” in the search bar), and toppings of choice. Makes 4 pancakes.
The post VEGAN SWEET POTATO PROTEIN PANCAKES WITH HOMEMADE SPICY BLUEBERRY JAM (SUGAR FREE) appeared first on My Digital Kitchen.
]]>The post HOMEMADE SPICY BLUEBERRY JAM (SUGAR FREE) appeared first on My Digital Kitchen.
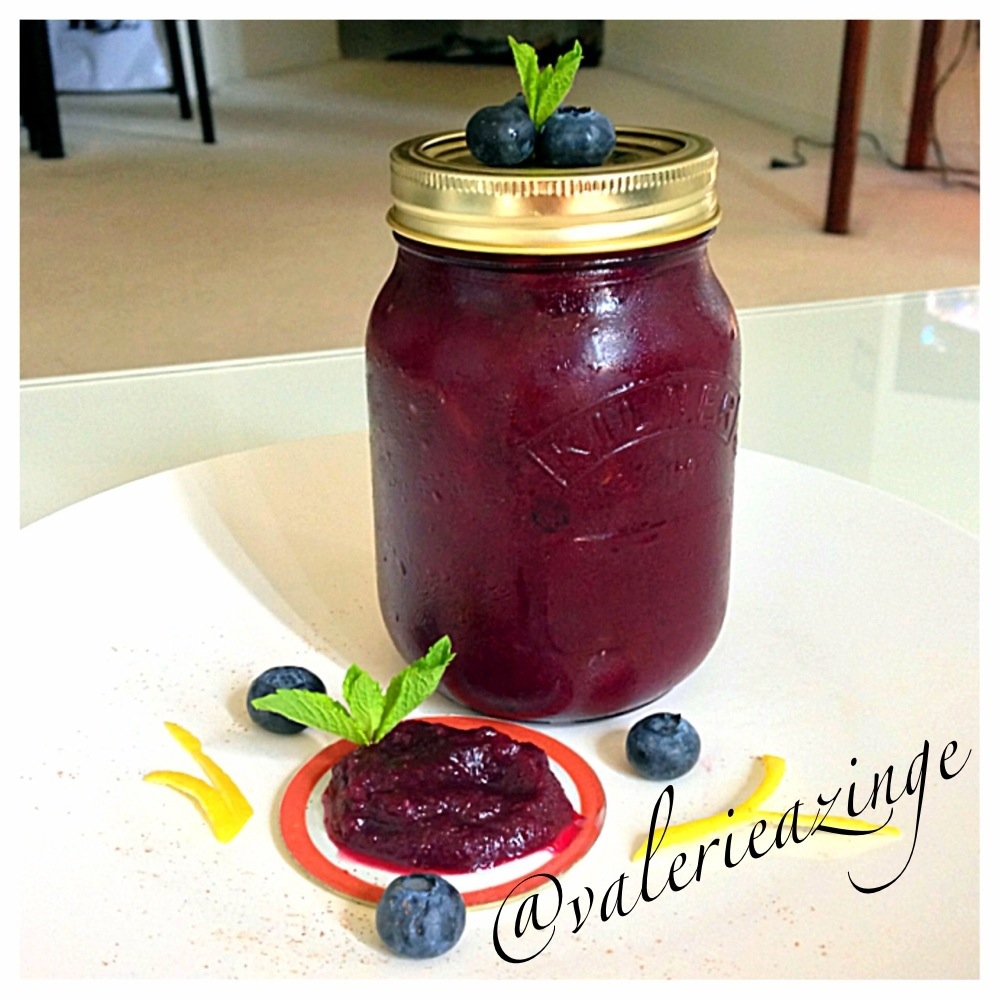
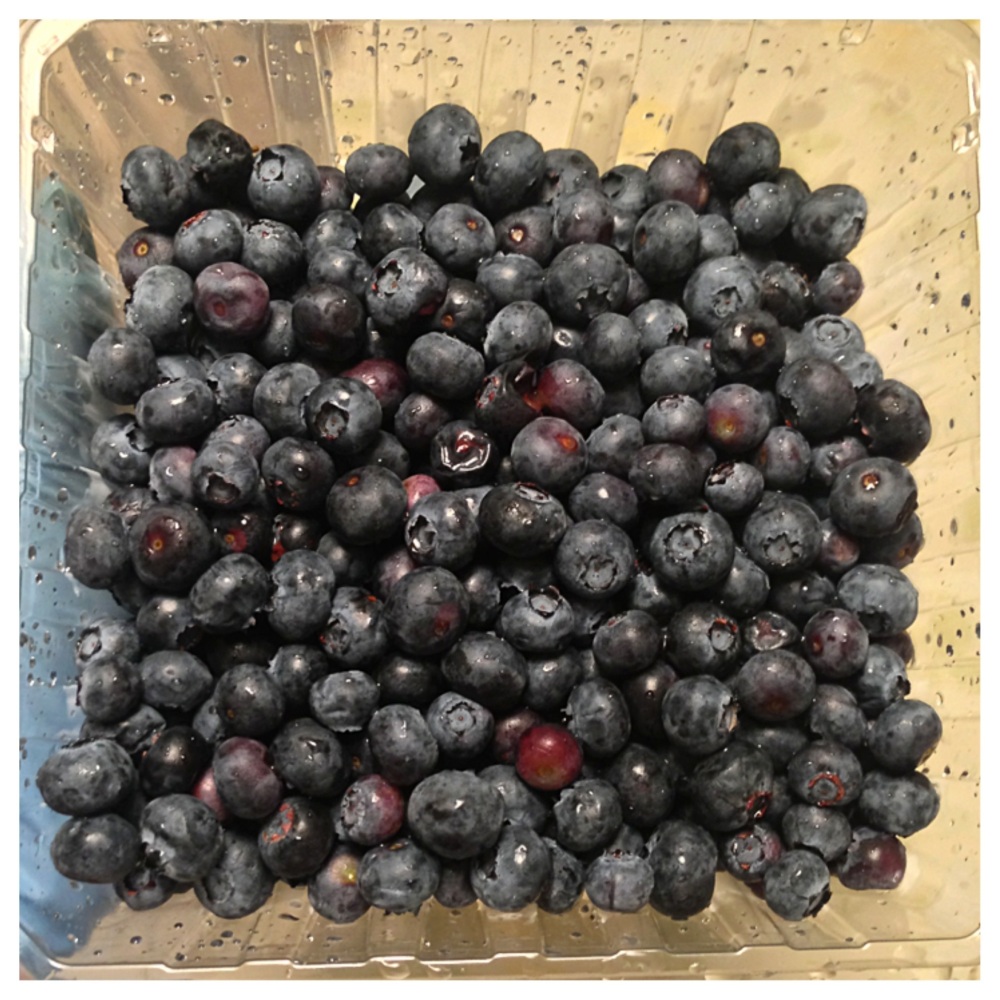
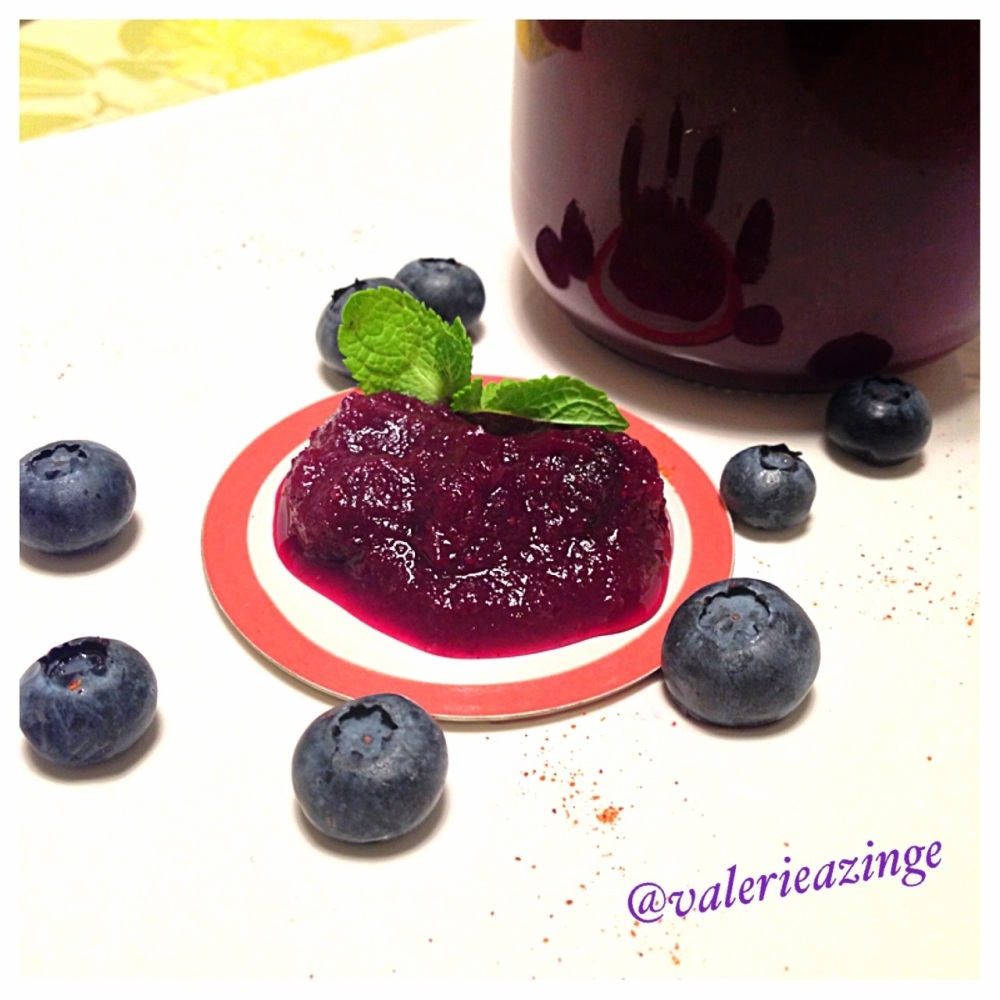
]]>Whoot! It’s jam time!! I love jam, but the store bought versions contain a lot of added sugars, which makes them crappy for you! So I made my own again! I already posted a spicy blackberry jam recipe so I decided to make its cousin, especially since I bought a ton of blueberries because they were on sale lol
Ahh there you go, here’s some luscious blueberry porn for you guys 
Plus, it also has a spicy kick to it, which makes the flavour more fun without being overwhelmingly noticeable. This is also very easy to make so don’t be turned off, think of it as boiled fruit 
Recipe:
3 cups organic fresh blueberries
2 cups organic unsweetened apple sauce
3 organic medjool dates (pitted and mashed)
1/4 tsp smokey paprika
Place pitted dates in the microwave with 1 tbsp of water and heat up for 1 minute. Mash dates with a fork when ready.
Place dates and remaining ingredients in a skillet over medium-low heat and let it cook for 40 minutes, stirring every 20 minutes.
When ready, let jam cool for 10 minutes before transferring into sterilized mason jars.
Store in the refrigerator or freezer. Keeps for a couple months when stored in the freezer and about 1 month when stored in the refrigerator.
The post HOMEMADE SPICY BLUEBERRY JAM (SUGAR FREE) appeared first on My Digital Kitchen.
]]>


