The post BLOOD ORANGE OLIVE OIL CAKE WITH LEMON CURD appeared first on My Digital Kitchen.
]]>It’s citrus season! Which means we get an abundance of colourful citrus fruits to bring us some joy during these gloomy winter months. We’re starting the citrus celebration with this Blood Orange Olive Oil Cake with Lemon Curd. it’s Paleo, refined sugar free, and the yummiest slice of heaven to ever hit your palate.

It’s only February, which means winter is at its peak, and so is Valentine’s Day, and also Family Day (yay!). So far, we have already had four snowstorms (plus another one scheduled for this evening), and two ice rain storms…yay.

However, I find some comfort in the vibrant colors that citrus fruits offer during this time of year. With bright yellows, greens, oranges and reds, I become beguiled by the beautiful colors and how much it enhances my mood. Not only do I love the taste of citrus fruits, but the amount of Vitamin C they provide is almost enough to keep your immune system alert during the cold winter days and nights.

The first time I tested this blood orange olive oil cake, I had no idea what to expect. I love olive oil, and I have previously used it in a gluten free brownie recipe which came out totally delicious. That’s why I was confident to take the risk with this citrus loaf, but of course, you need to know how you use it. Also, paleo recipes usually require a lot of eggs, and sometimes the end result can be well, quite eggy.

The verdict? A moist, citrusy, fluffy and mildly sweet cake that didn’t even last a day before it was devoured…mostly by me. This blood orange olive oil cake with lemon curd is an amazing way to combine gorgeous citruses with the olive oil from your pantry. So go ahead and give your palate a happy beginning.

- Lemon Curd:
- 2 lemons (zest + juice)
- ⅓ cup golden monk fruit sugar
- 4 egg yolks
- 3 tablespoons grass fed unsalted butter
- A sprinkle of sea salt
- Cake:
- 4 eggs
- ⅓ cup pure maple syrup
- ¼ cup extra virgin olive oil
- 2 teaspoons madagascar bourbon vanilla
- Zest and juice from 1 blood small orange (or ⅓ cup Grand Marnier)
- ⅓ cup coconut flour
- ⅓ cup + 3 tablespoons almond flour
- ½ teaspoon baking soda
- ¼ teaspoon sea salt
- Prepare lemon curd overnight. Combine all lemon curd ingredients in a double boiler or glass bowl over a pot of simmering water. Whisk constantly until the mixture thickens and coats the whisk. Pour the lemon curd into a heat-proof storage bowl and cover with cling wrap, pressing down against the edges. Refrigerate overnight.
- Preheat oven to 350°F and line a 9x5 loaf pan with parchment paper, or grease/spray the pan with oil.
- In a large bowl, combine eggs, maple syrup, olive oil, vanilla, blood orange and zest and whisk until smooth. Sift coconut flour, almond flour, baking soda and sea salt fold into the wet ingredients. Batter will be quite thin.
- Pour batter into the prepared loaf pan. Bake for 35-40 minutes, testing the batter with a toothpick. Cool for 10 minutes in the loaf pan, then gently turn out onto a wire rack until completely cooled. Top with lemon curd and additional blood orange slices. Serve.

The post BLOOD ORANGE OLIVE OIL CAKE WITH LEMON CURD appeared first on My Digital Kitchen.
]]>The post KIWI HONEY GALETTE appeared first on My Digital Kitchen.
]]>Sweet, tart, and easier than pie, this Kiwi Honey Galette is a yummy brunch treat to enjoy any day of the week!

It’s Friday at last and that makes me happy for two reasons. First, War for the Planet of the Apes comes out today and I get to see it, and secondly, I get to prepare for my pop up market which is happening on Sunday! It’s a yoga fundraiser for Sick Kids sponsored by Yogapalooza and I’m so excited that my company gets to participate. For my lovely readers who are in the Toronto /Mississauga area, I will be posting the link with the event details below. We will be selling some of our healthy sweet treats and I couldn’t be more excited! Oopps I think I’ve said” excited” way too many times already…. anyways moving on to this kiwi honey galette.

One of the reasons I enjoy baking galettes is how easy it is to put together compared to pies. I mean don’t me me wrong, pies aren’t that difficult once you get the hang of it, but galettes are basically a lazy guide to making a fancy pie. Plus, you could also get creative with the fruit fillings, or even go savory by using tomatoes, zucchinis or any meat protein of your choosing!

You could also make this entire galette vegan is you’d prefer. All you would have to do is substitute the butter with coconut oil sitting at room temperature, honey for agave nectar and viola! Personally, I have made pie crusts and galettes with coconut oil and although the crust comes out decent, you don’t quite get the flakiness you would get when you make the crust with butter. However, the galette still turns out pretty good, so do not be discouraged! It’s all about personal preference.

Well, since I’ve been running errands all day and still have a few more to run, I’ll have to keep this short and sweet, but mostly sweet because hey, kiwi honey galette!?! I hope you guys have a lovely weekend and enjoy the sunshine!

Here’s the link with the Yogapalooza pop up event details:
Yogapalooza, a Fundraiser for Sick Kids.
My Digital Kitchen – Yogapalooza.
- • For Crust:
- • 1 /14 cups chilled spelt flour
- • ¼ teaspoon sea salt
- • 1 stick cold unsalted butter, cut into cubes
- • ¼ cup plain fat free Greek yogurt
- • 2 teaspoons fresh lime juice
- • ¼ cup ice water
- • For Filling:
- • 2 cups sliced kiwis
- • 2 tablespoons pure honey, melted
- • 1 egg (for egg wash)
- For the crust, add flour and salt to a large bowl and mix. Cut in butter into the bowl and combine with a pastry blender until a coarse meal forms. In another small bowl, whisk together Greek yogurt, lime juice and ice water and add to the flour mixture. Using your fingers, mix in the wet ingredients until large lumps form before patting it into a ball. Cover the dough with plastic wrap and refrigerate for 1 hour.
- In a separate bowl, toss kiwi and melted honey together.
- Preheat oven to 400°F and line a baking sheet with parchment paper.
- On a floured countertop, roll out the dough into a 12-14-inch round. Transfer the dough to the baking sheet.
- Arrange the kiwis over the dough, leaving a 2-inch gap around the borders of the dough. Fold the borders over the fruit filling pleating the edges to hold the filling together. Brush the dough with the egg wash and transfer baking sheet to the oven.
- Bake for about 45 minutes or until the crust is golden brown. Let it cool for 3-5 minutes before serving.
The post KIWI HONEY GALETTE appeared first on My Digital Kitchen.
]]>The post BUTTERSCOTCH EGGNOG COCKTAILS appeared first on My Digital Kitchen.
]]>Tis the season! Finally, the festivities can begin. So on that note, may the festivities begin with these Butterscotch Eggnog Cocktails! Or as I’d prefer to call it, Santa’s Potion.

Rather than leave milk and cookies for Santa, just leave him these butterscotch eggnog cocktails and he will definitely leave you more gifts under your christmas tree while enjoying his happy juice. You guys cannot even imagine how excited I was to share these with your lovely faces! I’m already in a festive mood and will be sharing more holiday recipes on my blog!
Some people may suggest that I may have taken a lazy method to making these cocktails since the eggnog was not made from scratch. However, I prefer to defend it as an easy method, because why make eggnog from scratch when you can get yourself an Old Tom ready and waiting for you to enjoy? I mean I am 99% in favour of making things from scratch especially since I make most of my recipes that way. But sometimes, it’s okay to allow some brands take care of you! Plus, I still added some extra touches to it. So with that said, save your eggs for baking. Here are the ingredients and gadgets you need for Santa’s Potion:
8oz Eggnog
4oz Butterscotch Shnapps (Apple Shnapps will work as well)
Ice
Pinch of cinnamon
Martini shaker
2 glasses
Sugar to rim the glasses (I used cane sugar)

All you have to do is pour all of the ingredients except the cinnamon into a martini shaker and shake away like an aspiring bar tender. Sprinkle with some cinnamon and enjoy the experience! These Butterscotch Eggnog Cocktails make for a great adult dessert, or can be enjoyed by the warm fireplace while your family shares Stories about Krumpus. Way to kill the festive mood huh? Okay I take that back. Stick to happy stories and make fun memories with your loved ones this season. And of course, enjoy responsively
The post BUTTERSCOTCH EGGNOG COCKTAILS appeared first on My Digital Kitchen.
]]>The post “WHATS YOUR FLAVOUR?” PARFAIT SHOTS appeared first on My Digital Kitchen.
]]>Hello Everyone! I decided to have a little fun with my parfaits, so I came up with these. I call these my “What’s Your Flavour” Parfait Shots because I believe everyone possesses one or all of the personalities listed in the photo, but the question is, do they match your tastebuds? Lets find out!
Sexy Shot : A tiramisu inspired chocolate mousse dessert. It contains coconut cream (unsweetened), a tiny dash of coffee liqueur (baileys and coffee), cacao powder, honey, and semi sweet chocolate sprinkles.
Flirty Shot: Vanilla coconut whipped cream sweetened with stevia, layered with sweet strawberry slices, and topped with peppermint snow sprinkles.
Fun shot: Vanilla coconut whipped cream sweetened with organic coconut palm sugar, blueberry sauce (from melted frozen blueberries), and topped with rainbow sprinkles.
So I ask, which shot are you? 
The post “WHATS YOUR FLAVOUR?” PARFAIT SHOTS appeared first on My Digital Kitchen.
]]>The post DECADENT PUMPKIN GREEK YOGURT BANANA BREAD WITH TOASTED PECANS appeared first on My Digital Kitchen.
]]>Hello hello everyone! I’m slowly but surely getting into the pumpkin spirit and I’m loving it! I made this decadent yummy bread because my friend is coming over for a lunch date later, so this will be dessert, with some homemade ice cream, darn I spoil the people I love  I must confess I’ve already had a slice..or two, and it was hmm hmm good. The pecans are totally optional, but I think it tastes better when you get a nutty crunch with every slice. Cheers!
Recipe: Modified from closetcooking.com
Dry Ingredients:
1 cup brown rice flour
3/4 cup gluten free oat flour
1 tsp gluten/aluminum free baking powder
1/2 tsp gluten/aluminum free baking soda
1/2 tsp organic sea salt
1 tsp ground cinnamon
1/2 tsp grated ginger
1/2 tsp nutmeg
1/2 tsp cloves
Wet Ingredients:
2/3 cups organic coconut palm sugar (trust me, you want that amount. It has a low glycemic index, and you wouldn’t eat the whole bread ;))
1 cup organic pumpkin puree
2 large organic bananas
1/2 cup organic non fat plain greek yogurt
1 cup toasted pecans (crushed)
Pre-heat oven to 350°F.
Mix dry (except pecans) and wet ingredients in two separate large bowls until well incorporated.
Bring dry and wet ingredients together, then add pecans and mix until well incorporated.
Pour batter into a non stick 9/5 inch loaf pan. Grease with a dap of coconut oil if you want.
Bake for 55-60 minutes or until it passes the toothpick test.
When ready, let it cool for 15 minutes. The bread might be a little moist and that’s okay. But it will fall apart if you try to slice it when it’s hot. Be patient 
Top with additional toasted pecans and consume. Can me eaten with butter, cream cheese, honey, maple syrup, or by itself! With a pumpkin spiced latte 
The post DECADENT PUMPKIN GREEK YOGURT BANANA BREAD WITH TOASTED PECANS appeared first on My Digital Kitchen.
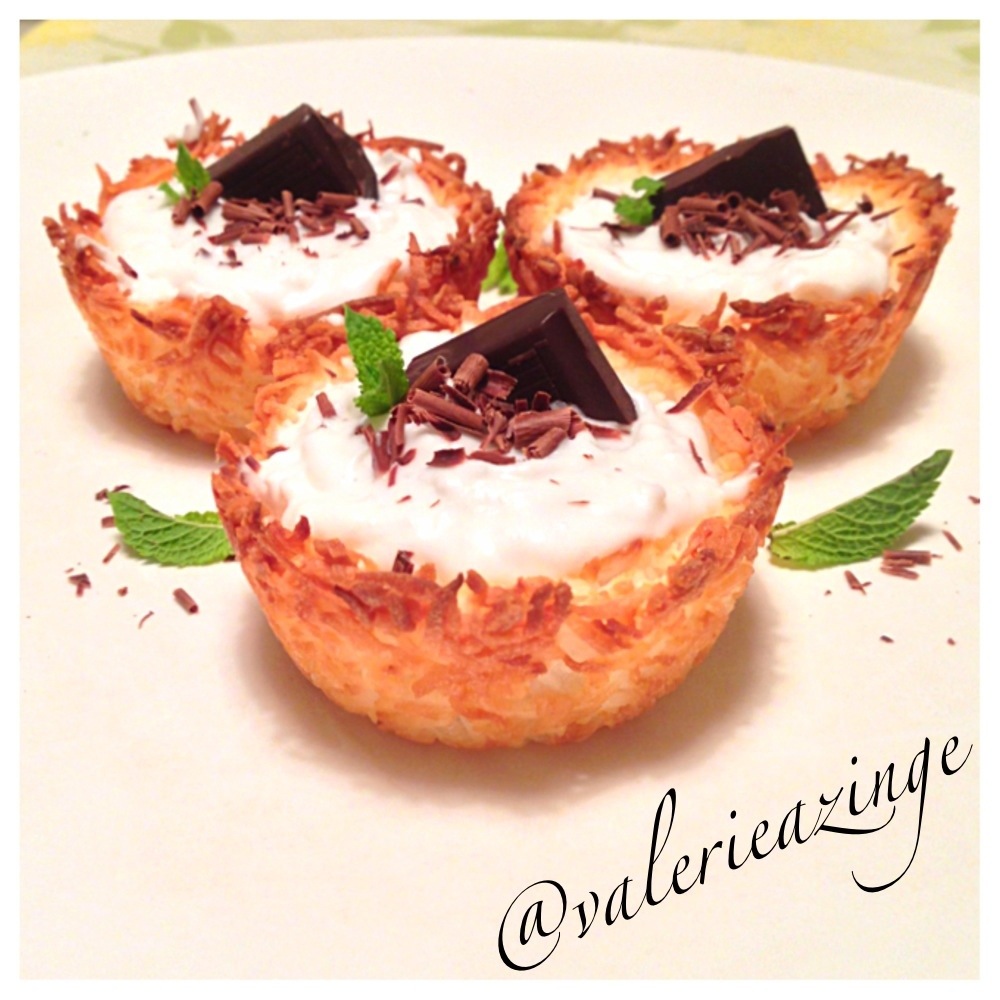
]]>The post PALEO COCONUT CREAM TARTS WITH DARK CHOCOLATE SPRINKLES appeared first on My Digital Kitchen.
]]>IT’S FRIDAY THE 13TH! Which only means one thing…..the weekend starts tomorrow  So I am kicking off the weekend with these yummy simple tarts, but I must warn you, you have to be a real coconut fan to enjoy these!
I love coconuts, so these were definitely right up my alley, and my girlfriends actually liked them. Alternatively, you could make these sugar free by substituting the natural sugars for stevia, but I believe they taste like a real treat with the sugars in my opinion, and besides, natural sugars aren’t bad for you, they are actually packed with nutrients and don’t have a huge impact on your blood sugars because of their low glycemic index. But with that being said, use in moderation 
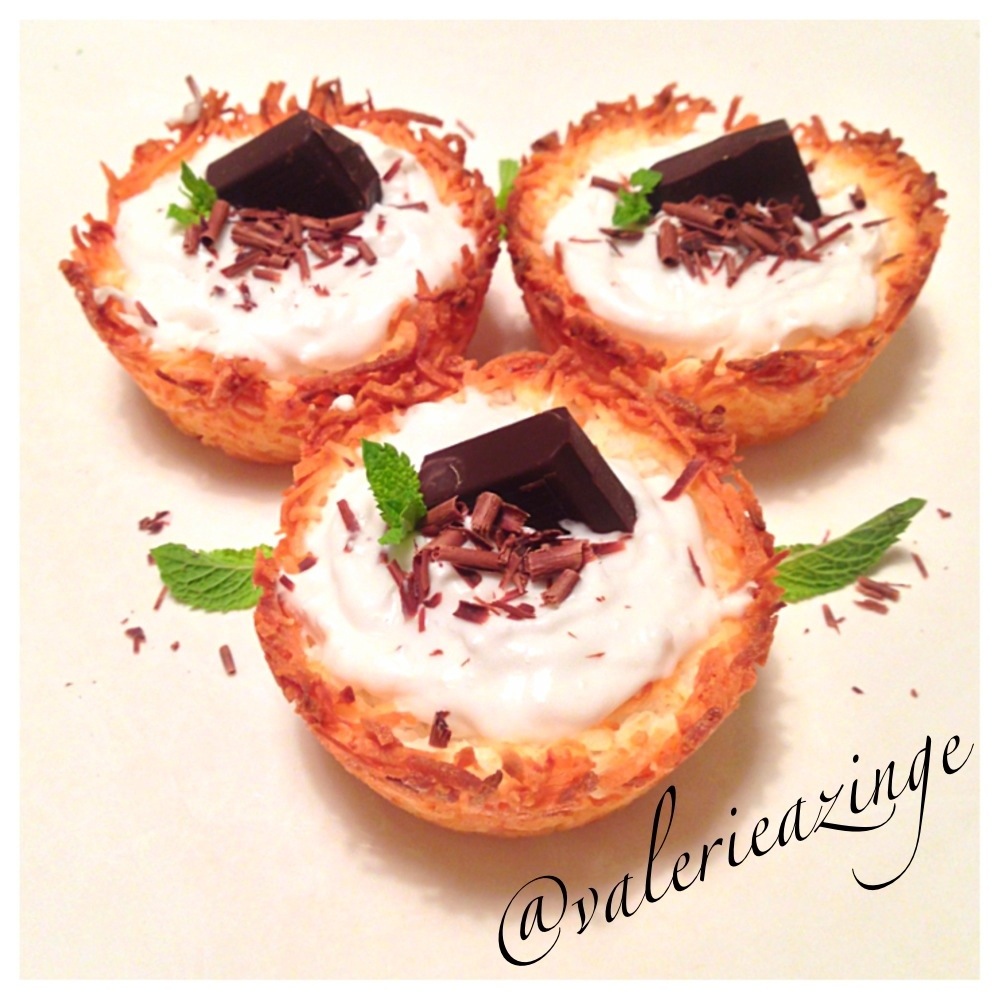
Here’s an extra shot of my yummy foodporn treat, enjoy!
Recipe for shells: makes 8
2 cups organic unsweetened coconut shreds
2 tbsp organic coconut palm sugar
2 organic cage free egg whites
Recipe for cream filling:
2/3 cups organic unsweetened coconut cream (store the can in the fridge overnight and scoop out the cream that forms at the top the next day)
1 tbsp organic raw honey
1/4 tsp organic pure vanilla extract
Toppings:
Good quality organic dark chocolate (70% or higher) i used 80% camimo dark chocolate squares.
Pre-heat oven to 350°F.
Mix shell ingredients in a bowl until well incorporated.
Grease a muffin pan with coconut oil or butter. Scoop 2 tbsp of the coconut mixture into each section of the muffin pan.
Bake for 12-15 minutes, (mine were ready in 12 minutes).
When ready, take the tart shells out of the oven and let them cool for 10 minutes.
Using a hand mixer, mix the cream filling ingredients in a bowl. The coconut cream might have some frozen lumps which might make it harder to pipe, so make sure your cream is smooth.
Place cream mixture in a pipping bag or ziplock bag with the tip slightly cut off and fill up your cups.
Garnish with chocolate sprinkles or toppings of choice and consume when ready!
The post PALEO COCONUT CREAM TARTS WITH DARK CHOCOLATE SPRINKLES appeared first on My Digital Kitchen.
]]>The post QUINOA VANILLA PUDDING IN A BAKED CINNAMON APPLE BOWL appeared first on My Digital Kitchen.
]]>Gotta love Fridays! Especially when you get to enjoy delicious treats like this  Who says healthy food has to be boring and gnarly? Not me! This yummy apple bowl is packed with protein, fibre, and yummy deliciousness. Plus it’s also a great recipe to have for the fall…oh no, summer is almost over! Oh well, bring on the pumpkins!
Recipe: serves 1
1 organic red apple
1/4 cup organic quinoa (cooked)
3 tbsp canned organic unsweetened coconut milk
1/8 tsp organic pure vanilla extract
1 organic sweet leaf stevia packet
A dash of cinnamon (for the apple)
Dark chocolate shavings (optional for topping)
Pre-heat the oven to 400°F.
Core your apple and sprinkle the top with a dash of cinnamon. Place apple on a baking sheet lined with parchment paper and bake for 20-25 minutes.
Boil raw quinoa in a skillet over medium heat with 1/2 a cup of water for 15 minutes or until fully cooked. Strain out the water and place the quinoa into the skillet. Add coconut milk, vanilla extract, and stevia and let it cook for 5 minutes over medium heat until a thick pudding has formed.
Take out the apple from the oven when ready and top immediately with the quinoa pudding. Top with dark chocolate shavings.
Enjoy warm!
The post QUINOA VANILLA PUDDING IN A BAKED CINNAMON APPLE BOWL appeared first on My Digital Kitchen.
]]>The post DARK CHOCOLATE CUPS WITH COCONUT VANILLA WHIPPED CREAM AND FRESH BERRIES (DAIRY FREE, GLUTEN FREE, PALEO) appeared first on My Digital Kitchen.
]]>It’s Friday! Whoot whoot! And since I love Fridays, I decided to make these yummylicious chocolate dessert cups because I love the heck outta chocolate  This yummy chocolate creamy dessert can be enjoyed after a meal, or as a sexy dessert for date night, so get naughty
  These are also dairy free, paleo, vegan, and nut free! So you really can’t go wrong with it if you have any food intolerances or allergies, and you basically only have to rely on your tastebuds to do the judging. Have a great day everyone! Cheers
Recipe: makes 8
1/3 cups diary free chocolate chunks (i used enjoy life)
1 can full fat organic unsweetened coconut milk (thai kitchen is a good brand)
1/2 tsp organic pure vanilla extract
Fresh berries
1 organic stevia sachet (or more depending on how sweet you want the cream)
Place coconut milk in the refrigerator overnight (you don’t have to take it out of the can).
Next, melt your chocolate in the microwave for 1 minute. You can add 1/2 tsp coconut oil if you want it smoother.
When melted, place 1 tbsp of chocolate in individual silicone muffin cups. (You could use paper or foil cups, but I find the silicone cups easier to use). Use a pastry brush to evenly spread out the chocolate on all sides of the silicone cups.
Place in the freezer until firm, (mine firmed up in 15 minutes)
Meanwhile, make your coconut whipped cream. Take out your coconut milk from the refrigerator and scoop out the coconut cream from the top of the can, it should have formed a thick cream. Make sure you keep the water at the bottom of the can separate from the cream when scooping it out.
Place your coconut cream in the bowl and whip it with a hand mixer. Add vanilla and stevia and whip again until a whipped texture forms.
Place whipped coconut cream in a pipping bag. You can also place it in a ziplock bag and make a small incision at the tip.
Take chocolate cups out of the freezer and slowly take it out of the silicone cups, (if you take them out un a hurry they will break).
Add the coconut whipped cream into the cups and top with fresh berries.
Enjoy!
The post DARK CHOCOLATE CUPS WITH COCONUT VANILLA WHIPPED CREAM AND FRESH BERRIES (DAIRY FREE, GLUTEN FREE, PALEO) appeared first on My Digital Kitchen.
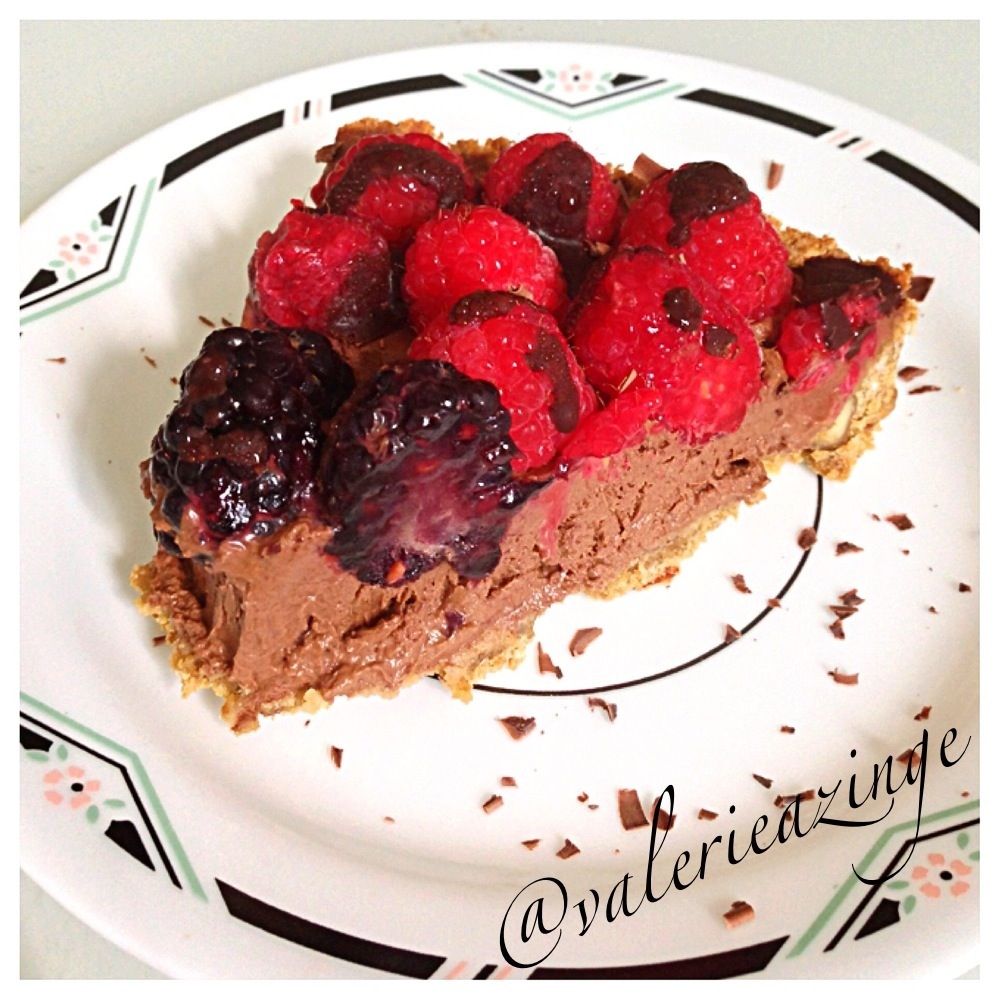
]]>The post CHOCOLATE BERRY MOUSSE PIE appeared first on My Digital Kitchen.
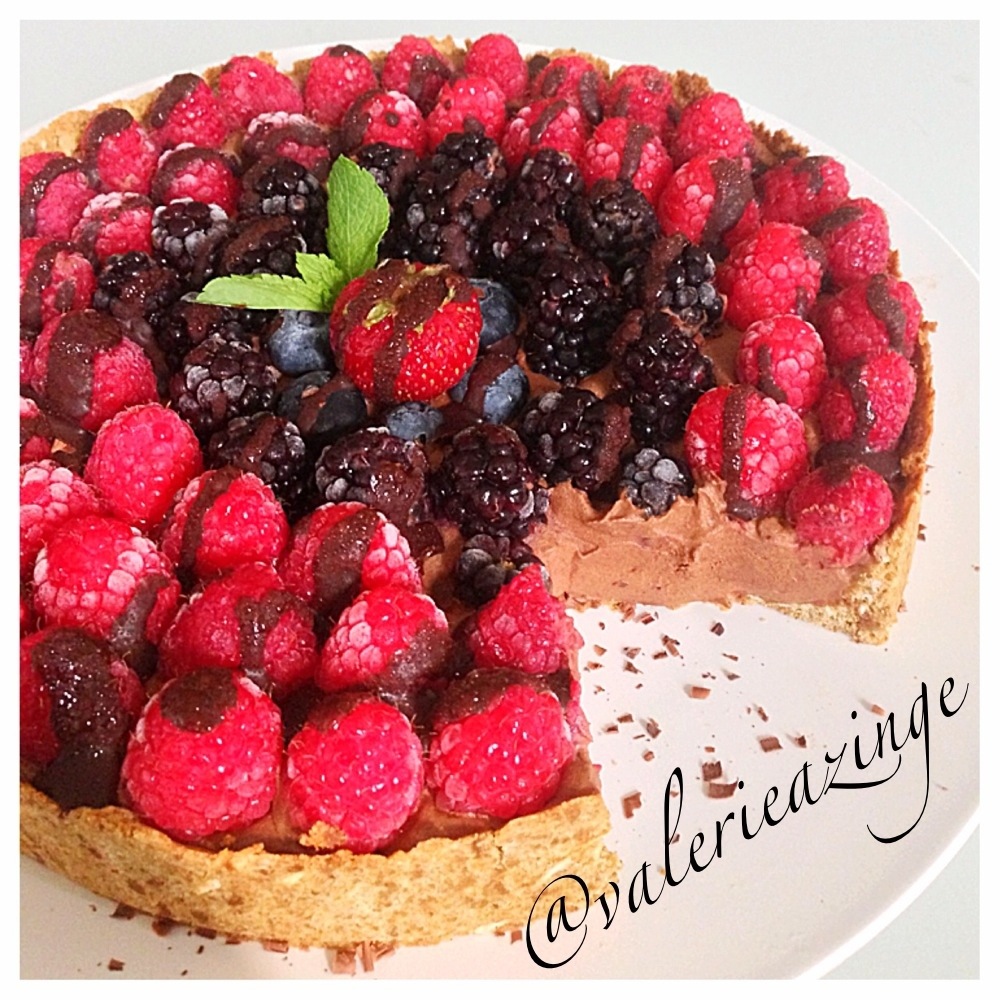
]]>Friday funday whoot whoot! We are having a potluck at work tomorrow and this is what I’m bringing! I had to make this last night because I work till late tonight and I’m at it again bright and early the next morning, which wouldn’t give me time to make anything. Good thing this potluck is on my cheat day! Although everything would be eaten in moderation (yes everything!!) I definitely tasted this pie and it was so yummy and light I wanted to smash it all in my face 
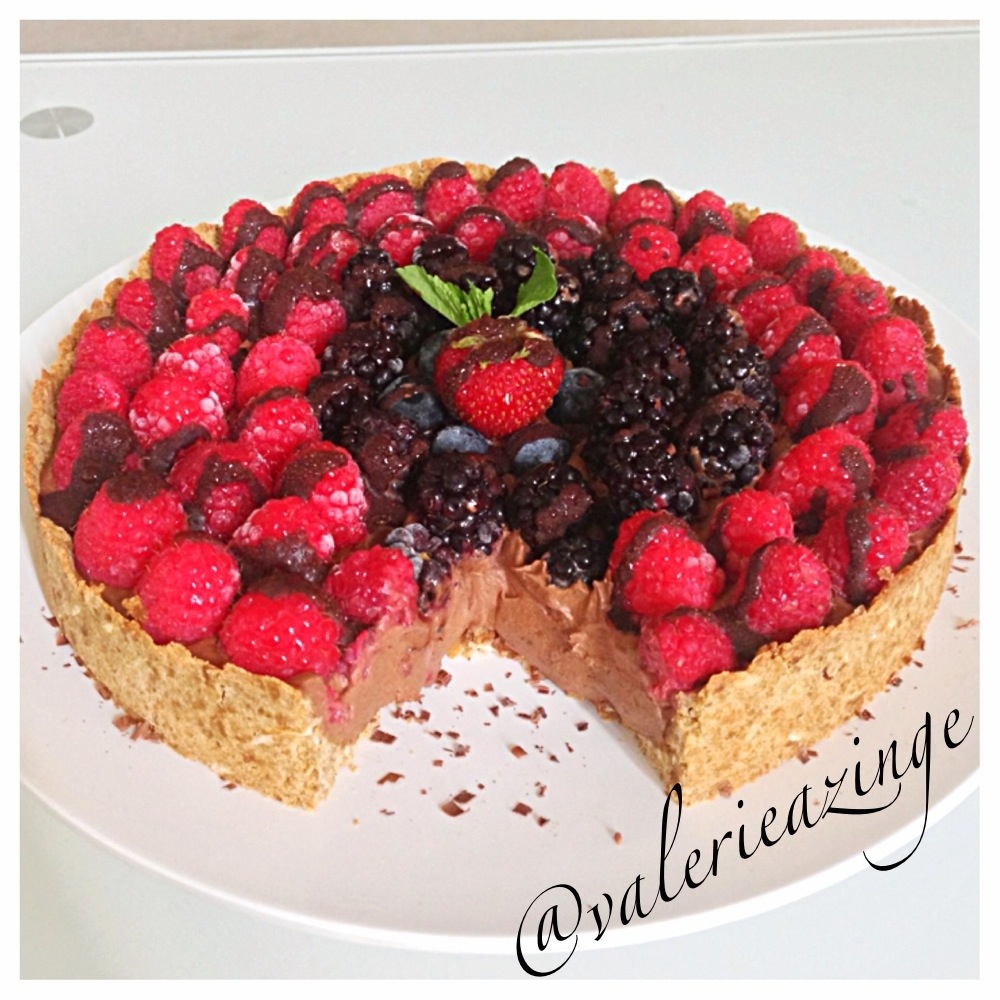
Isn’t it fun to look at? I hope my co workers love it as much as I love them! 
Recipe: modified from thehealthyfoodie.com
Crust:
1 1/2 cups brown rice flour
2 tbsp crushed pecans
2tbsp unsweetened shredded coconut
1 tbsp organic coconut oil
2 tbsp organic raw honey (melted)
1 tbsp organic blackstrap molasses
1/4 cup organic unsweetened apple sauce
1/4 tsp sea salt
1/4 tsp ground cinnamon
Chocolate mousse filling:
1 ripe organic avocado
2 cups organic unsweetened coconut cream (place 2 cans of full fat coconut milk in the refrigerator overnight and scoop out the cream from the top of the can)
3/4 cup raw cacao powder
1/4 cup organic pure maple syrup
2 tbsp organic raw honey (melted)
1/4 tsp sea salt
Pinch of cinnamon
A splash of organic pure vanilla extract
Chocolate drizzle:
1 tbsp organic raw honey (melted)
2 tbsp organic coconut oil
1 tbsp raw cacao powder
Topping:
A ton of berries! Whatever you prefer, go berry crazy 
Pre-heat oven to 350°F.
Mix all crust ingredients in bowl until a brown crumbly batter forms.
Transfer crust into a greased baking dish and mould crust until the bottom and the sides are covered (sides should be about an inch high).
Place crust in the oven and bake for 10 minutes or until golden brown.
Take crust out of the oven when ready and let it cool for 10 minutes.
Chocolate mousse filling:
Place all ingredients in a food processor or blender and purée until a fluffy mousse texture forms.
Pour mousse into the pie crust and spread it out until the entire crust is covered.
Topping:
Place your berries of choice on top of the mousse. Try to get them as close together as possible.
Chocolate drizzle:
Mix ingredients in a mug and drizzle chocolate on top of berries using a teaspoon.
Place the pie in the refrigerator for 2 hours or the freezer for 45 minutes for the chocolate mousse filling to set properly prior to serving.
Enjoy when ready! You can store this in the refrigerator or freezer, and it should keep for about 5 days.
The post CHOCOLATE BERRY MOUSSE PIE appeared first on My Digital Kitchen.
]]>The post CINNAMON ORANGE POACHED PEAR appeared first on My Digital Kitchen.
]]>The weather was amazing today! 22°C and lots of sunshine, but the sad part about this beautiful weather was that I had to work, so I was indoors for most of my day  However, it’s friday night and I wanted to compensate myself with a nice but healthy treat since I missed out on all that good sun, so I made these! One word, MORE!
Recipe: serves 2
2 cups water
2 cups freshly squeezed orange juice (from orange)
1 organic Bosc or barret pear
1/4 tsp ground cinnamon
A dash of ground ginger
A dash of nutmeg
Orange zest (for topping)
First, peel the skin of your pear and core it.
Add pear and all ingredients into a small skillet and cover the top with parchment or foil paper (this will prevent it from browning)
Let pear simmer in mixture for 30 minutes or until pear is soft over medium heat.
When pear is ready, set aside and let the mixture simmer on low heat for 3-5 minutes.
Top with additional cinnamon and orange zest when ready.
The post CINNAMON ORANGE POACHED PEAR appeared first on My Digital Kitchen.
]]>


